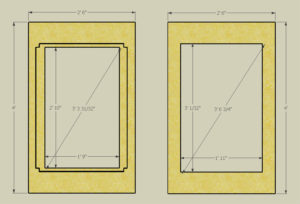
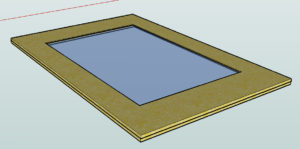
After waiting about 20 hours and letting the silicone rubber cure overnight, I went ahead and “unmasked” the silicone to see how it cured. From the look of it, it cured quite nicely. It isn’t completely even as far as the whole thing being completely smooth and 1mm thick, but this really shouldn’t affect it’s performance. After further inspection, I found that there were no bubbles in the silicone! Bubbles are one of the main concerns when pouring silicone yourself. I think my success had to do with mixing the A and B parts for a good amount of time (12 minutes).
Personal projects, research and development I’ve documented.
Pouring the Silicone
Well, the silicone arrived today. It took 5 days from the time of ordering online. I’ve done a lot of research, talking to others that have poured silicone and watched a couple videos so I was prepared for what I needed to do.
The best video to date is from Blaxwan and it really provides great documentation and information on how to pour the silicone.
[youtube=”http://youtube.com/watch?v=bnjeWbvVCCo”]
Here are a couple things not mentioned in the video that I would like to add:
1) Make sure that you read the directions carefully on the package.
2) Measure out the portions of A and B by weight (not volume) with a gram scale. The main reason most people don’t get the silicone
Compliant Surface Samples
Well, I recieved a couple samples of possible compliant surface silicone sheets. Unfrotunatley after some testing, I’ve found they won’t work for FTIR use.The first is from www.rubbercal.com. The durometer (hardness) of the sample is just too high (probably around 70) and therefore doesn’t stick to the acrylic at all. The other sample I recieved is from Rubber House on ebay. This sample is just too thick (1/16″), although it may be a great alternative if the supplier ever gets 1/32″ or thinner sheets in stock.
Since these samples did not “do the trick” and other mentioned brands posted on nuigroup.com aren’t ideal, I’ve decided to go ahead and order Smooth-On Sorta Clear 40 since it has been recommended on
FTIR or DI, my final multitouch decision…
After spending a large amount of time focusing on Diffused Illumination ( Rear DI), I’ve switched my concentration back to FTIR. I had great results with DI and was happy with the ease of use and setup, but one issue I had was the constant calibration I would have to go through every time I tested. This most likely had to do with an incomplete setup and open box where the IR light, shinning at the acrylic, would easily change as the environment changed. Although with some fixing it is possible to have a great DI setup, I’ve chosen to go with FTIR.
There are a couple main reasons for this decision:
FTIR and DI. How they work and what they mean for multitouch.
FTIR and DI are the two main technologies used in NUIGroup (I will be posting information on alternative techniques at another time):
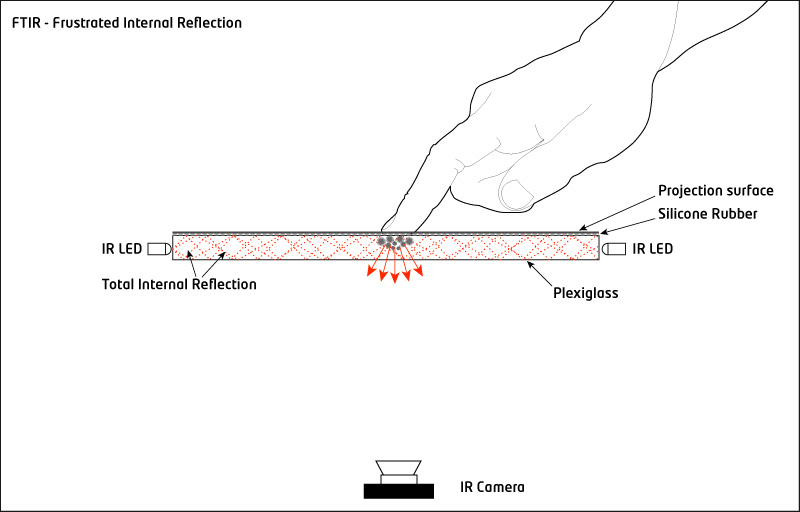
FTIR = Frustrated Total Internal Reflection (a phenomenon) – This is currently the most popular method, possibly due to the wide internet distribution of Jeff Han’s videos. IR light is shined into the side of an acrylic panel (most often by shinning IR LEDs on the sides of the acrylic). This light is trapped inside the acrylic by internal reflection. When a finger touches the acrylic surface this light is “frustrated” causing the light to scatter downwards where it is picked up by a IR camera.
Initial Multitouch Budget
The following is the initial budget for this project. Like most projects, the budget will often change or expand beyond what was originally intended. As developments change or new items are purchased, I will update the budget to reflect any changes made.
Initial Multitouch Aesthetic Plans
My aim is to create a clean and simple table design. I don’t want the table aesthetics to outweigh or detract from the musical interface and interaction. I did a quick sketch of my initial Aesthetic thoughts using Google SketchUp. I will include pictures of the actual progress and SketchUp files once the building process begins. The following design is not set in stone, but will be the basis as I start the building.
Initial Multitouch Build Timeline
This is the initial timeline for the AudioTouch project. As I make progress, it is possible that things may move away from the timeline, but I will be doing my best to keep things as close to the timeline as possible. Since this project requires two main parts, hardware and software, I will be starting with the hardware end since this is what needs to be stable in order to develop working software. I started designing a proof-of-concept musical application already, but will rewrite it in time for week 5. Further software progress really won’t start until the table design is relatively finished (by week 8).


