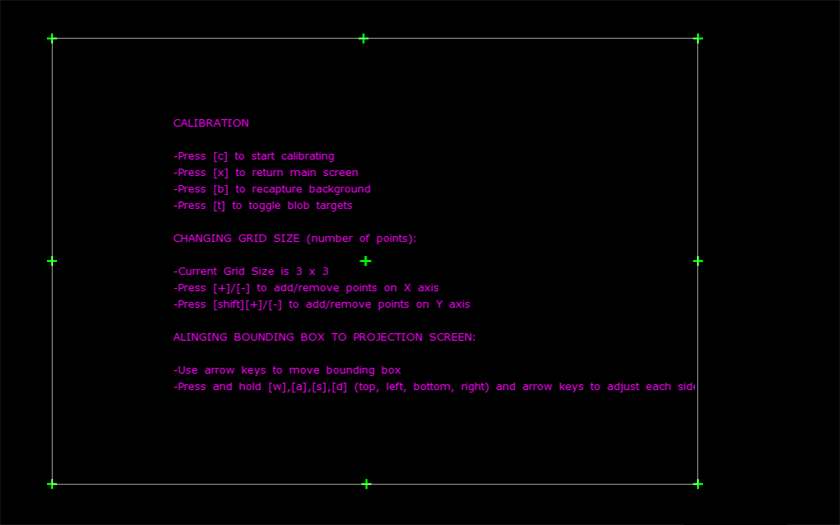
In order to calibrate CCV for your camera and projector/LCD, you’ll need to run the calibration process. Calibrating allows touch points from the camera to line up with elements on screen. This way, when touching something displayed on screen, the touch is registered in the correct place. In order to do this, CCV has to translate camera space into screen space; this is done by touching individual calibration points.
Follow the directions below to setup and perform calibration.
note: For those displaying an image on the touch surface (projector or LCD) , you’ll need to set up your computer so that the main monitor is the video projector so that CCV is displayed on the touch surface.
Requirements
- Clear and distinct blobs in CCV. If you haven’t already setup CCV to track blobs, visit the CCV Configuration Guide before proceeding.
Calibration Instructions
1. Press the enter calibration button or “c” to enter the calibration screen.
- A grid of green green crosses will be displayed. These crosses are calibration points you touch once we begin calibrating (step 4).
- There is a white bounding box that surrounds the calibration points. If a visual image is not being displayed on the touch surface (MTmini users), skip to step 3; otherwise, continue.

2. (MTmini users skip this step) If the white bounding box is not fully visible or aligned with the touch surface, follow the directions under Aligning Bounding Box to Projection Screen displayed on the CCV screen to align the bounding box and calibration points so they fit the touch surface. The goal is to match the white bounding box to the left, right, top, and bottom of your screen.
- Aligning Bounding Box to Projection Screen:
- Press and hold “w” to move the top side, “a” to move left side, “s” to move bottom side, and “d” to move right side.
- While holding the above key, use the arrow keys to move the side in the arrowed direction.
- In other words, Hold “up arrow”, then “left arrow” on your keyboard to get the upper corner at the top left corner of your screen, then hold “s + down arrow”, then “d + right arrow” to get the bottom right corner in position. Up, down, right, left arrows will make the box move, and a combination of up, down, right, left and z, q, s, d or equivalent on qwerty keyboard will make the edges move.

3. If using a wide angle camera lens or need higher touch accuracy, more calibration points can be added by following the Changing Grid Size directions on screen. note: adding additional calibration points will not affect performance.
- To Change Grid Size:
- Press “+” to add points or “-” to remove points along the x-axis.
- Hold “shift” with the above to add or remove points along the y-axis.
- If this does not work, you may want to try “_”, and “+/-” from the numerical pad.
4. Begin calibration by pressing “c.”
5. A red circle will highlight over the current calibration touch point. Follow the directions on screen and press each point until all targets are pressed.
- If not projecting an image on the touch surface (MTmini users), you may guess or draw the touch points directly on the touch surface so you know where to press.
- If a mistake is made, press “r” to return to the previous touch point. If there are false blobs and the circle skips without you touching, press “b” to recapture the background and return “r” to the previous point.

6. After all circles have been touched, the calibration screen will return and accuracy may be tested by pressing on the touch area. If calibration is inaccurate, calibrate again (Step 4) or return to the main configuration window “x” to adjust the filters for better blob detection.
7. Now, you’re ready to run a application by following the application setup guide below.